How do I set up one‑page checkout in Shopify?
Shopify one-page checkout shows customer details, shipping, and payment on a single screen. This reduces checkout time, removes extra steps, and helps customers complete purchases faster.
Why Shopify introduced one-page checkout
Shopify replaced the old multi-page checkout to make buying easier. Customers now complete checkout around 4 seconds faster, which helps reduce cart abandonment and improves conversion rates.
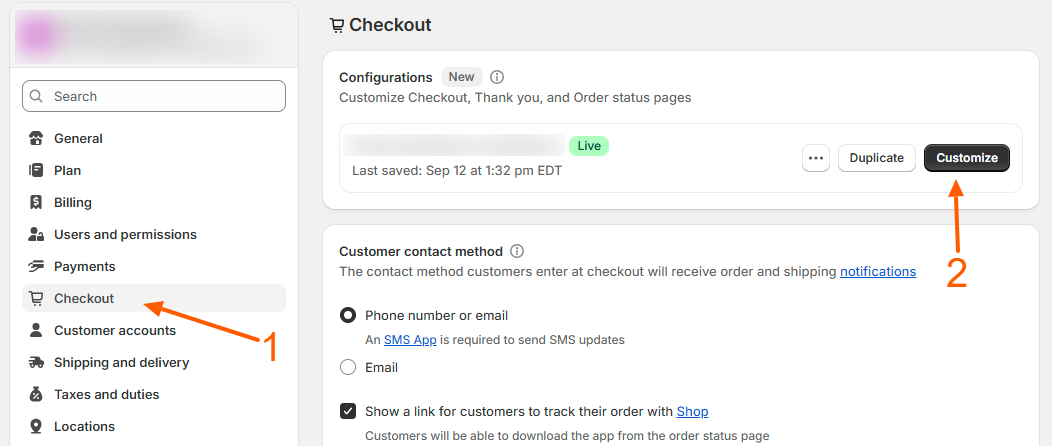
Step 1 – Open checkout customization
→ Go to Settings → Checkout
→ Open your active checkout configuration
→ Click Customize
Step 2 – Find checkout layout
→ In the left sidebar, scroll to the bottom
→ Click Checkout layout
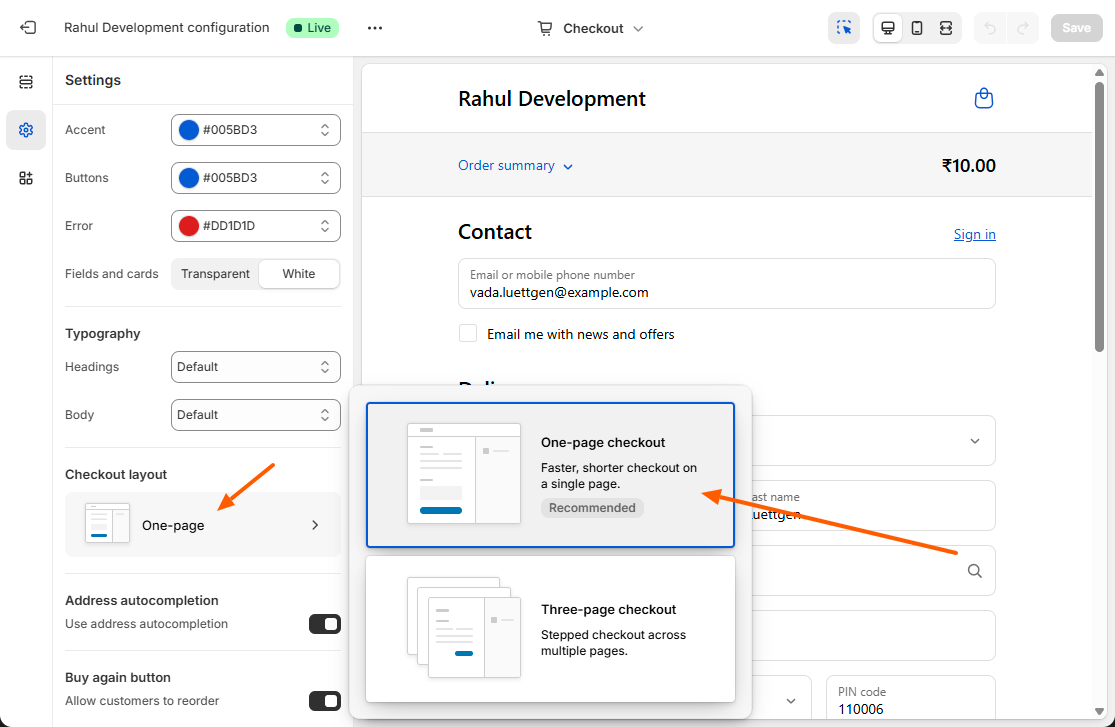
Step 3 – Enable one-page checkout
→ Select One-page
→ Click Save
What changed in one-page checkout
- Customer info, shipping, and payment appear on one page
- Shipping methods load faster
- Billing address is streamlined
- Fields are auto-filled where possible
- Fewer clicks to complete orders
Important notes
→ One-page checkout is now the default for all Shopify stores
→ Non-Plus stores cannot switch back to multi-page checkout
→ Shopify Plus stores can switch between layouts using Checkout Extensibility
Benefits
- Faster checkout
- Better mobile experience
- Higher conversion rates
- Lower cart abandonment
Related Answers
Still need help?
Talk to our Shopify experts
We've handled GDPR/CCPA compliance for dozens of EU & US Shopify stores.