How do I choose and install a Shopify theme?
Choosing the right Shopify theme helps your online store look professional, load faster, and convert more visitors into customers. Shopify allows you to add, test, preview, and change themes anytime without losing your products or data.
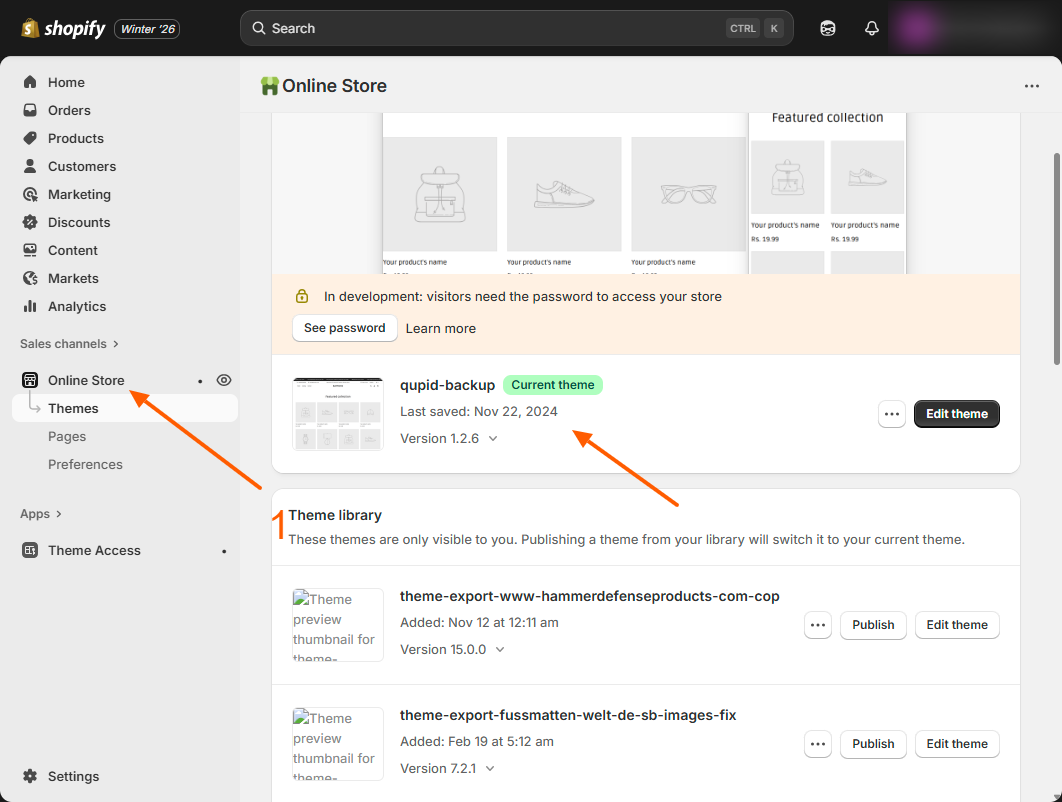
Step 1 – Go to your Shopify Themes page
From your Shopify admin dashboard, click Online Store > Themes. You will see your current live theme and your Theme Library.
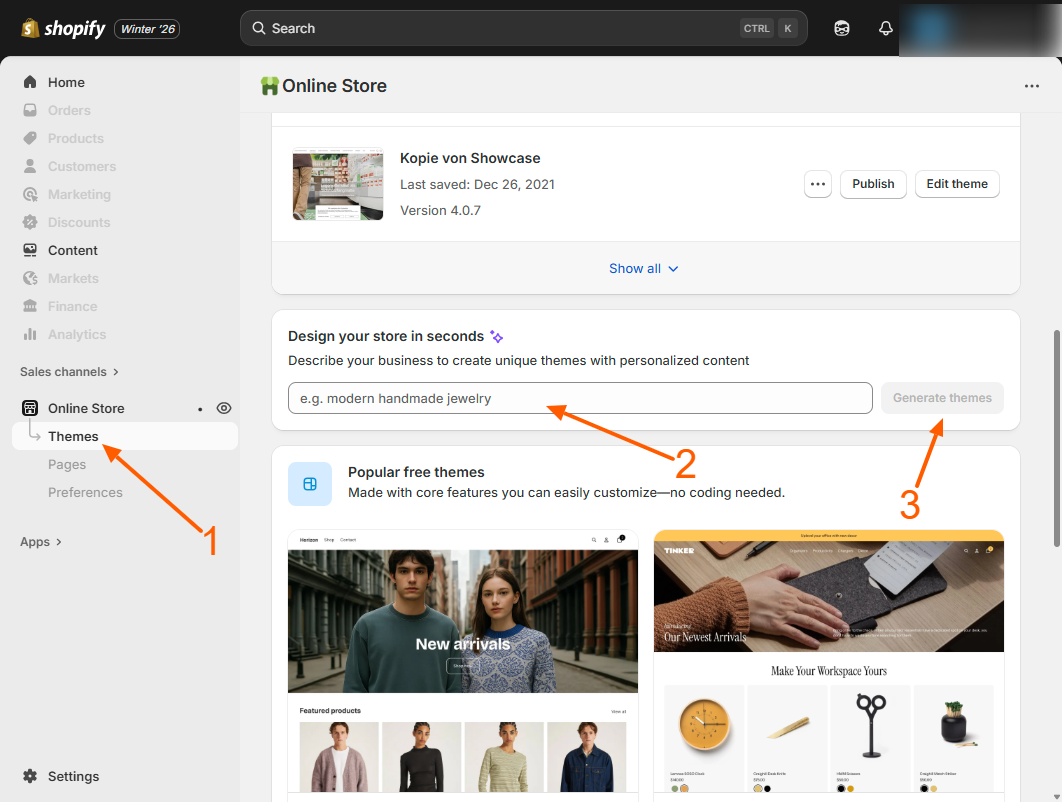
Step 2 – Choose how you want to get a theme
You can add a theme in any of these ways:
- Generate a free theme using Shopify AI
- Add a free theme from Shopify
- Try or buy a paid theme from the Shopify Theme Store
- Upload your own theme ZIP file
Step 3 – Generate a free AI theme (optional)
In the Design your store in seconds section, describe your business in simple words and click Generate themes. Shopify will create up to 3 free themes for you.
Important:
- This AI theme generator is available only on Free Trial, Basic, Grow, and Advanced Shopify plans.
- If you are on the Starter plan, Shopify shows only the Spotlight theme — the AI generator will not appear.
- If your store uses a Custom or Shopify Plus plan, Shopify hides this option because enterprise stores must use fully supported stable themes.
- Your storefront language must be set to English to see this option.
If you don’t see this option in your admin, it’s due to your plan or language settings — not a technical problem.
Step 4 – Add a free theme from Shopify
Scroll down to Popular free themes. Click any theme → Click Add. The theme will be saved in your Theme Library.
Step 5 – Try a paid theme
Visit the Shopify Theme Store. Click Try theme to preview and customize it before buying. You can try up to 19 paid themes at once.
Step 6 – Buy your selected theme
Once you like a paid theme, click Buy. Only purchased themes can be published on your store.
Step 7 – Upload your own theme (optional)
If you already have a theme ZIP file: Go to Online Store > Themes > Import theme > Upload ZIP.
Step 8 – Preview your theme before publishing
Click Preview to see how your store looks on desktop and mobile. You can also share preview links with your team or clients.
Step 9 – Publish your theme
When everything looks perfect, click Publish to make it live. Your products, collections, and pages stay safe while changing themes.
Helpful Tips
- Choose fast, mobile-friendly themes for better Google rankings.
- Always preview themes before publishing.
- Keep one backup theme saved in your library.
Choosing the right Shopify theme improves store speed, customer trust, and overall sales performance.
Related Answers
Still need help?
Talk to our Shopify experts
We've handled GDPR/CCPA compliance for dozens of EU & US Shopify stores.