How do I customize the product page layout in Shopify without coding?
Step 1 – Open your theme editor
From your Shopify admin, go to Online Store → Themes. Next to your current theme, click Edit theme.
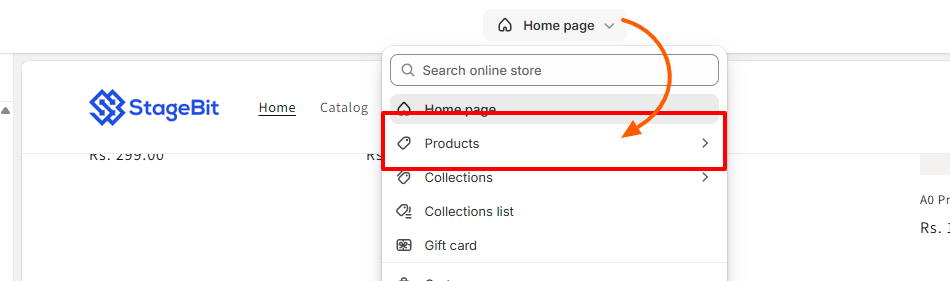
Step 2 – Switch to the product page
At the top-center of the screen, click the page dropdown that says Home page. From the list, choose Products → Default product. Your product page will now open in the editor.
Step 3 – Add or remove sections
On the left sidebar, click Add section. You can add product info, image galleries, reviews, size charts, FAQs, or trust badges.
To remove a section, click it and choose Remove.
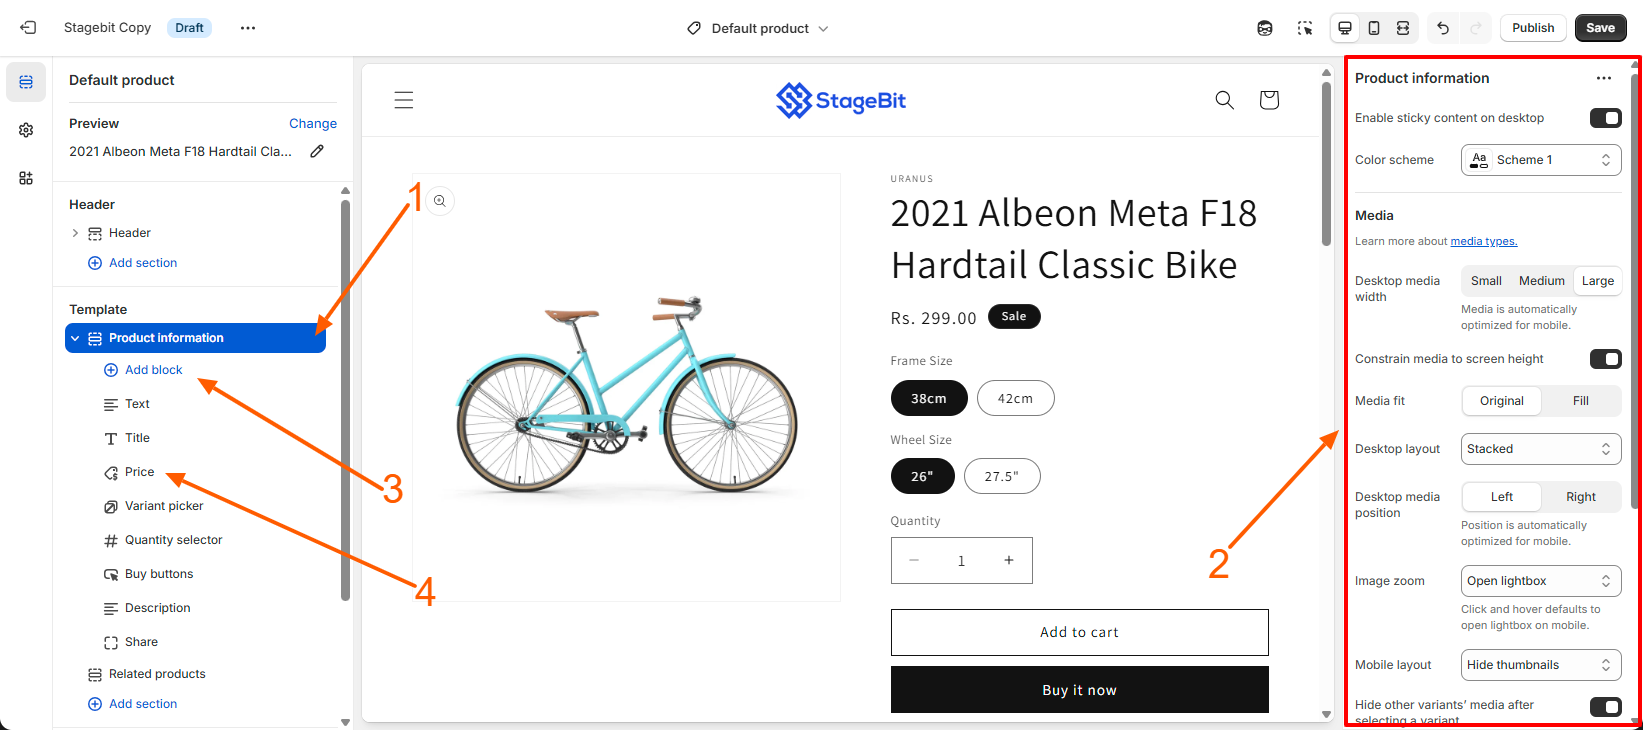
Step 4 – Edit product content
Click any section on the product page. All editing options appear in the right-side settings panel. Here you can change text, images, colors, spacing, and layout style.
Step 5 – Rearrange the layout
Drag and drop sections up or down to change the page order. This lets you control what customers see first.
Step 6 – Customize buttons and variants
Click the Product information section to manage:
- Add to Cart button style
- Variant selectors like size and color
- Stock messages
- Price display options
Step 7 – Preview and save
Use the device icons at the top to preview mobile and desktop views. When everything looks good, click Save.
Related Answers
Still need help?
Talk to our Shopify experts
We've handled GDPR/CCPA compliance for dozens of EU & US Shopify stores.