How do I create and edit menus and mega menus in Shopify?
Menus in Shopify help visitors navigate your store, while mega menus allow multiple layers of links under one main heading. You can create and edit them easily using the Navigation section and your theme’s built-in header settings, no coding required.
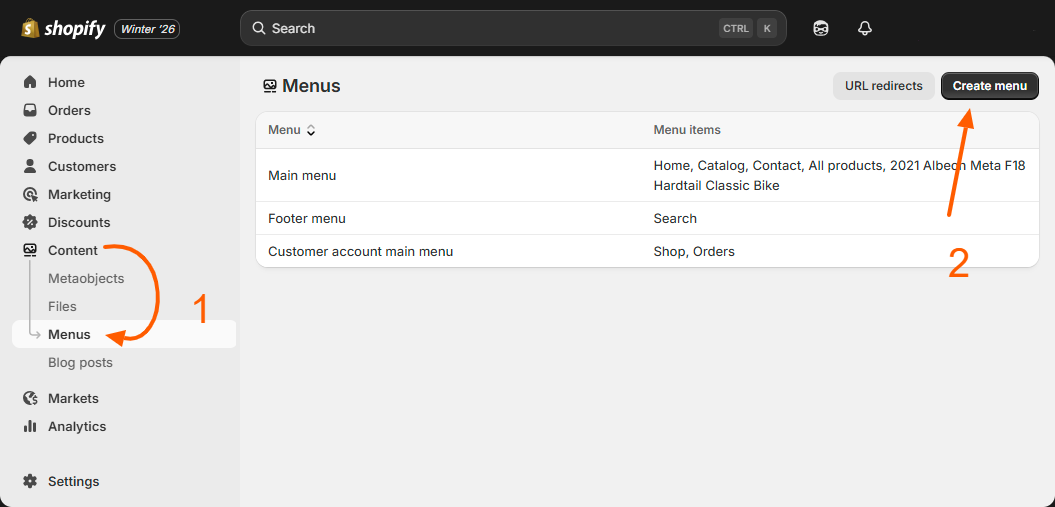
Step 1 – Open Shopify Navigation
From your Shopify admin, go to Online Store → Navigation. This is the control center where all your store menus are created and managed.
Step 2 – Create your main menu
Click Add menu. Give your menu a clear name like Main Menu or Header Menu, then click Create menu. This menu will be used in your store’s top header.
Step 3 – Add your main menu links
Click Add menu item and start adding your primary links such as:
- Home
- Shop
- Collections
- About Us
- Contact
Choose where each link should go (product, collection, page, or URL) and click Add. Repeat until your main menu is ready.
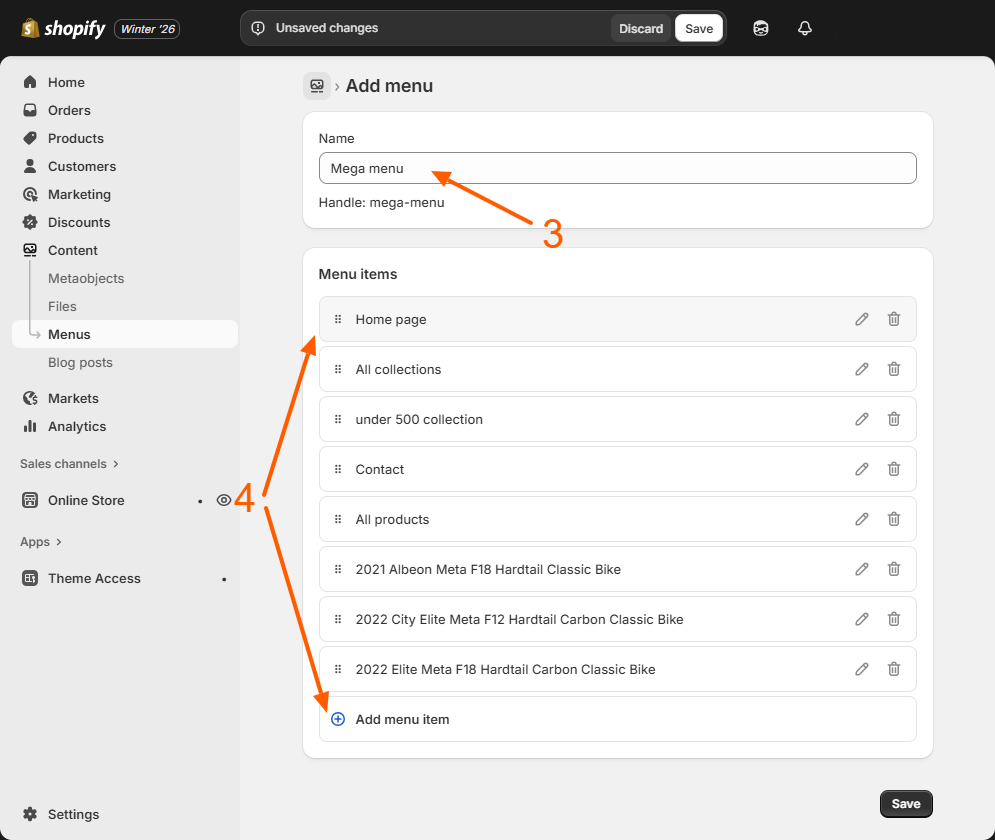
Step 4 – Save your main menu
Once your main menu links are added, click Save menu. Your basic header menu is now ready and can be connected to your theme.
Step 5 – Turn your menu into a mega menu
Now comes the powerful part. To create a mega menu, simply drag a menu item slightly to the right under another menu item.
The right-shifted items automatically become submenus. These stacked layers are what create the mega menu structure in modern Shopify themes.

You can add:
- Categories under Shop
- Sub-collections under Collections
- Extra pages under About
You can even add a third level by dragging items under a submenu to create multi-column mega menus.
Click Save menu once your mega menu layout is ready.
Step 6 – Assign your menu in the theme header
Go to Online Store → Themes → Customize.
Open the Header section on the left panel.
Now follow this flow:
- Header → Menu dropdown → Click
- Choose your menu (Main Menu / Header Menu)
👉 If this is your first time adding a menu, simply select your menu from the list.
👉 If a menu already exists, click the dropdown and choose your new menu to replace the old one.
Once selected, your menu will instantly appear in your store header preview.
Step 7 – Check if your theme supports mega menus
In the theme editor, click your Header section.
Now look on the right-side settings panel for:
- Desktop menu type → Click the dropdown
If you see an option like:
- Mega menu
👉 Select it to enable the built-in mega menu layout for your store.
If your theme does not show a Mega menu option, then your theme does not support mega menus by default. In this case you have two choices:
- Install a mega menu app from the Shopify App Store
- Or customize your theme using custom code
Once enabled, your submenu links will automatically expand into multi-column mega menus in your store header.
Step 8 – Preview and save your menu
Use the device icons to preview your menu on desktop and mobile.
If everything looks correct:
- Click Save
- Your menu goes live instantly
✅ Result: Your store now has a clean, professional menu or mega menu that makes it easy for visitors to explore categories, collections, and pages with multiple levels.
Related Answers
Still need help?
Talk to our Shopify experts
We've handled GDPR/CCPA compliance for dozens of EU & US Shopify stores.